Gingerweb Blog
Instructions for Blogging on a Gingerweb website
So the chances are if you have got to here that we have set you up with your own shiny new blogging system on your website and you are wondering how to start or what to even blog about !
The first challenge is to know how to write your first blog so please follow the instructions below and you will be off and running !
Updated January 2018
- Login to the admin backend section of your site - www.yourdomain.co.uk/administrator
- Navigate to COMPONENTS and EASYBLOG
(New Editor information) The blog software is constantly being updated and there is now a new editor option which allows you to use a pre made template for your blogs. If you would like to try this out for a specific blog or for all your blogs all you have to do it change the editor which is a simple process. So before you start with the instructions below have a quick look at this process before you start on the list below:
 Click on Settings which opens up and then click on Editor. You will see a drop down option after the line that says "Default Editor"
Simply change this between the two options that are easiest for you. "Editor - JCE" is an advanced editor which will show you lots of options the same as in a Joomla article but the other option is to use "Built In - Easy Blog Composer" if you change the editor to this and click SAVE in the top left corner you will then be presented with several template options when you start your blog.
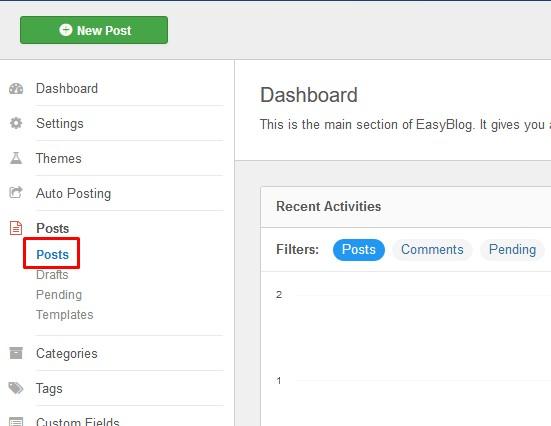
So now click on Posts and again where the submenu opens up click on Posts again.
Now click on NEW which is the green button top left of the screen.
You will be presented with 4 options.
Blank Post - Template for Event - Template for News and Template for Videos
The most useful one is the Template for News, click the one you want and simple change the text to your text and click Upload on the Image blocks to upload and set your images.
This is a beginners guide to using the composer (you will need to have read and completed the above to make sure you can see it!)
If you have used the built in composer you can now go down to Item 10 to get the rest of the process right - it is worth it I promise.
- This is the blog control panel, you will probably only need to go to BLOG ENTRIES (POSTS on newer installation) click here for image -
- Make sure firstly that you are set as the “blogger” so in the filter drop down sections select your name if it isn’t already and the right category, again if it isn’t already. (Post 2016 ignore this as you will be!)
- Then click NEW from the large buttons at the top
- Give the blog a catchy Title – this will form part of the page URL and Google will pick up on it if its relevant to your page content.
- Ignore the “permalink” field this will auto populate and create the URL (under the heading)
- So the section where you create the blog is the same as an article on the website, all the same editing functions are available so you can make tables, insert images and make them “popup”, the world is your oyster here. Can I please suggest that you don’t go mad with different colour fonts and huge text, this might seem a good idea at the time but rarely looks professional !!
- Extra instructions on “popup” images can be found here :
 Website Editing adding popup pictures.ppt these will be improved and expanded soon – any suggestions, please comment below.
 - It works best if you use a landscape picture around 700px wide as the very first thing on your blog, centre the image and this will show up in the email that your subscribers will see, it looks great, try it!
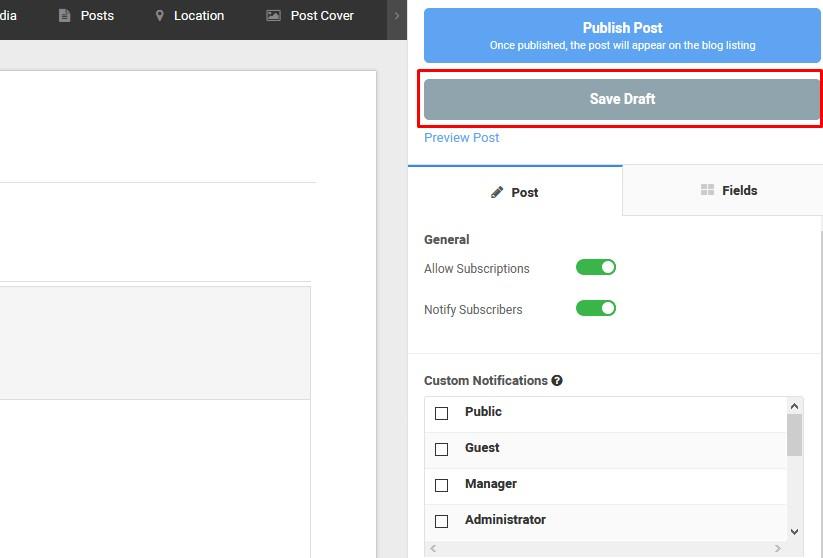
- It might be an idea if you are going to take more than 15 minutes to write your blog that you select “Save Draft” from the top right of the page and regularly SAVE your work – to avoid timing out and having to start again. Remember to Publish when you are ready.
- When you are ready to Publish go to TAGS on the right side and create new ones (type in the box and press Enter on your keyboard) or select previously used ones (by starting to
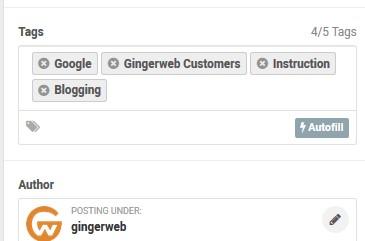 type) – TAGS are vitally important because it will take the reader and most importantly Google around your blogs via links. You can use up to 5 on each blog so choose carefully and ALWAYS USE THEM !!
 - When you are done and have checked spelling you can Publish your Post - top right button. You can always go back and change something after publishing.
- If you find anything that you don’t understand or cant get to work right then comment below and i will get back to you as quickly as i can!
FINALLY REMEMBER THESE RULES FOR BEST RESULTS:
1. ALWAYS put a link in the blog to the product/page you are referring to on your website
2. ALWAYS use the tags which collate and refer to all the other relevant material sitewide
3. ALWAYS promote in this order : BLOG first then Social media link to the blog
4. If you can get people to comment on the blog then even better
If you want a blog on your website please drop us a line and we can have you up and running in just a few hours - Google loves a blog and it could just be the answer to your page 1 dreams !
When you subscribe to the blog, we will send you an e-mail when there are new updates on the site so you wouldn't miss them.